First Time Setup
Place the plugin's jar into your server's plugins folder.
Restart the server and go to the newly generated
plugins/AxDiscordLink(on Velocity folder names are in lowercase) folder.If you see a
token.secretfile, you did it correctly, now open that and put it aside.Next we need to create the discord bot, because we are using our own bot, this needs to be done on discord's developer portal.
Head to the Discord Developer Portal and click on "New Application".

Give it a name, (you can name it anything) accept Discord's Terms of Services and click on "Create".
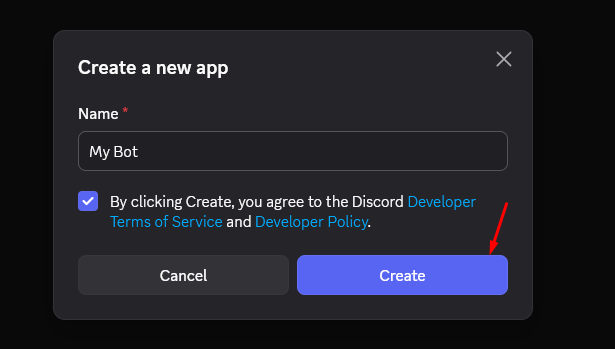
Go to the "Bot" section on the left.
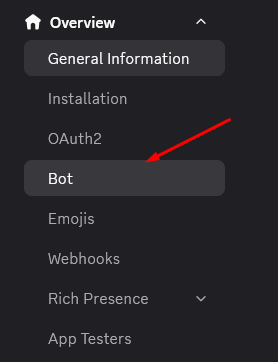
Next, optionally you can give your bot a username, icon, banner.
Click on the "Reset Token" button, then click on "Yes, do it!" in the confirmation modal.

Copy the token and paste it into the
token.secrettext file that we have opened. (delete everything from the text file before pasting)

After you have saved the
token.secretfile, the next is going to be setting up the intents of the bot and then inviting it to your discord guild.Scroll down to the "Privileged Gateway Intents" section and enable the "Server Members Intent".
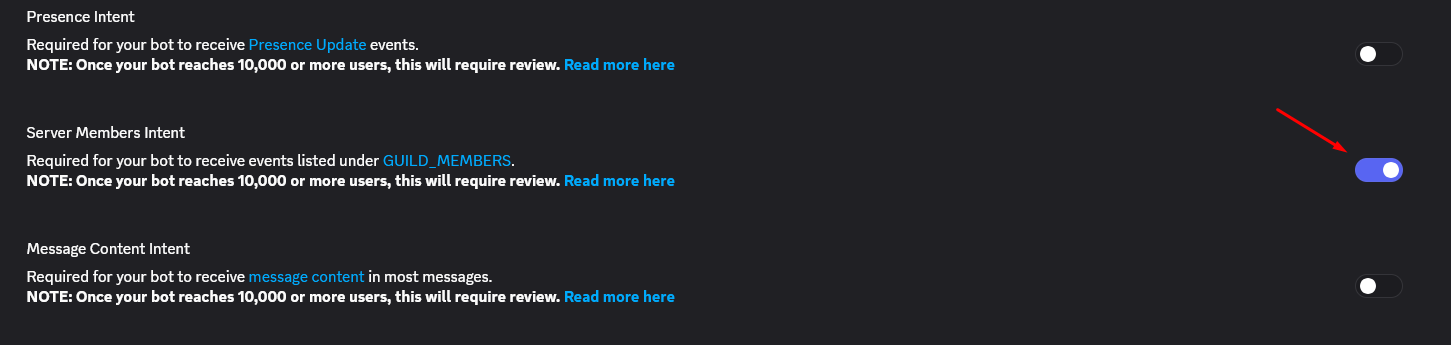
This is required for the automatic Discord → Minecraft role sync to work. You can keep this disabled if you are not planning on using that.
After the modifications, make sure to click on "Save Changes".

Go to the "Installation" section on the sidebar.
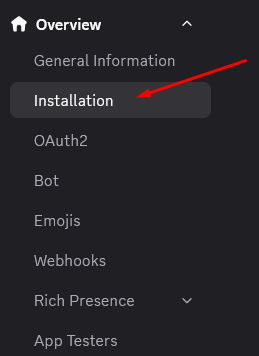
At the bottom, click into the "Guild Install" and add
botto it.
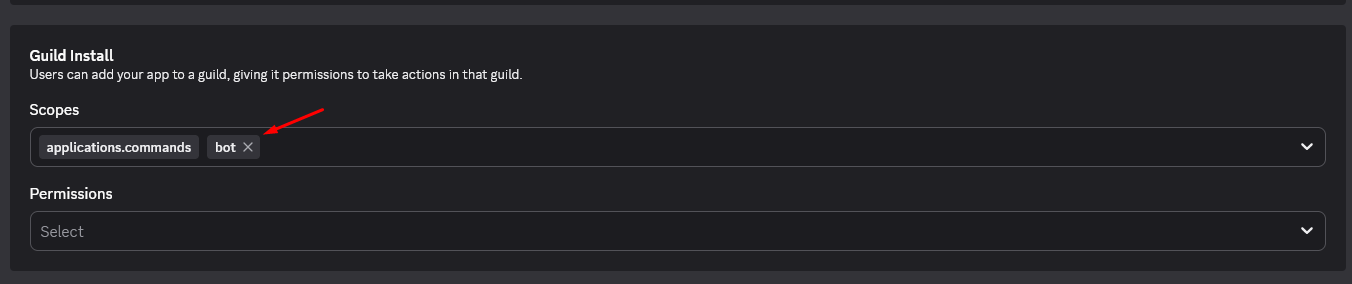
Give the bot all the required permissions.

The Manage Nicknames is used for the nickname sync, the Manage Roles for the role sync and the Send Messages for the webhooks, you don't have to give this, you can also manually give access to webhook channels later.
After the modifications, make sure to click on "Save Changes".
Scroll up and copy the "Install Link".

Paste the link into a browser and add the bot to your server.
After that you should see that the bot has joined, however there are still a few more steps.
First lets quickly make it impossible for people to invite our bot. In the same "Installation" interface set the "Install Link" to
none.

After the modifications, make sure to click on "Save Changes".
Go back to the "Bot" section on the sidebar and disable the "Public Bot" setting.

After the modifications, make sure to click on "Save Changes".
Next go to your discord server. If you are planning on using the bot to sync roles to from Minecraft to Discord, then you must move the bot above all the user roles. This is an example of that set up in the
Server Settings → Roles:
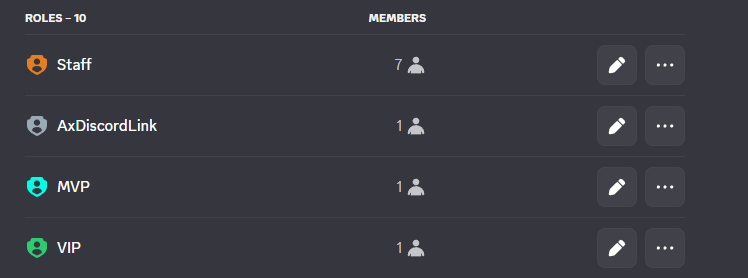
This is required, otherwise the bot won't have the permission to add roles above itself. This is also safe, because we didn't give any unnecessary permissions to the bot.
We will also need to give our discord bot the ID of our discord guild, so it can retrieve the members. For this, you need to enable Discord's "Developer Mode".
If you don't have it enabled, go to the "User Settings", scroll to the bottom and click on the "Developer" option. In that menu, toggle "Developer Mode" on.
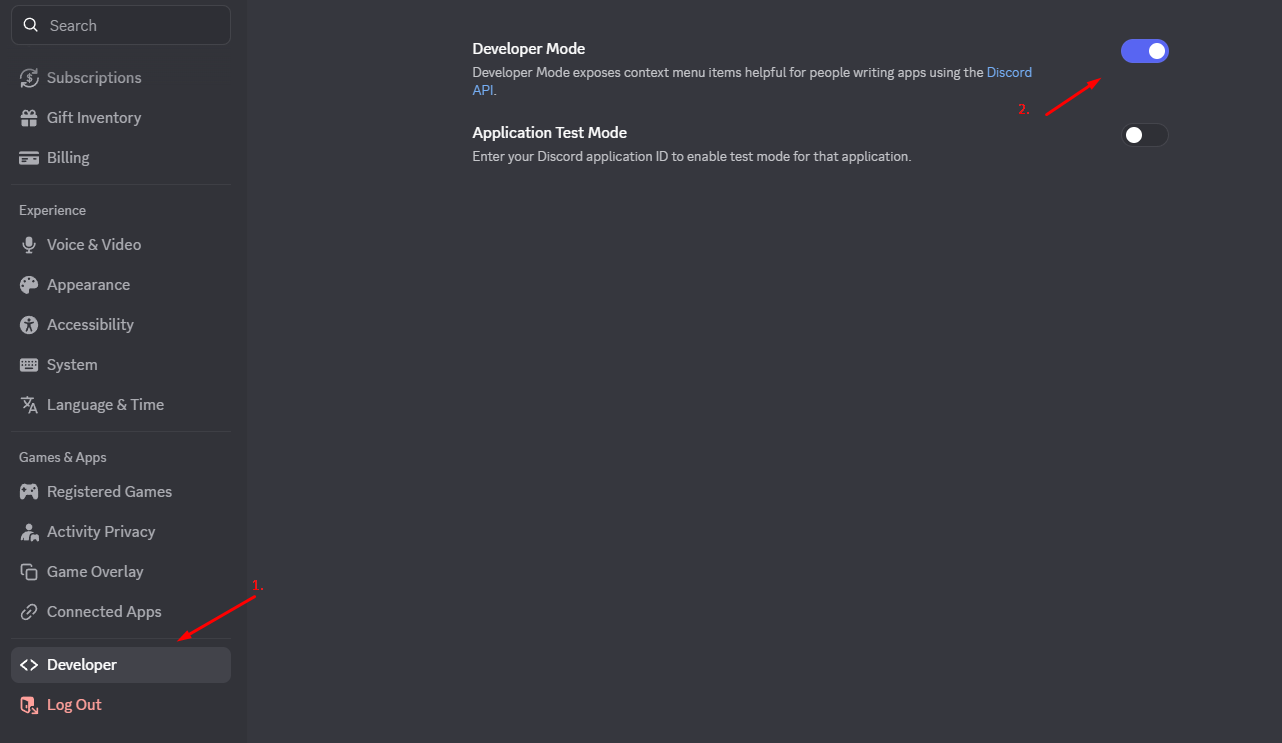
Right-click on your discord guild's icon or name and click on "Copy Server ID"
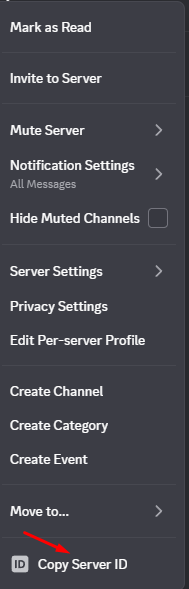
Next go to the plugin's config.yml (plugins/AxDiscordLink/config.yml) and replace the bot -> guild-id value with the ID that you have copied.
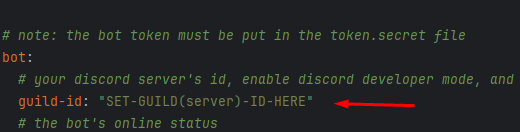
Save the file and run
/axdiscordlink reloadingame. If you see the[AxDiscordLink] Bot successfully started on the <name> discord guild!message in the console, everything is set up correctly!
If everything is working, then we are ready! Next, you can customize the plugin to your server's needs.